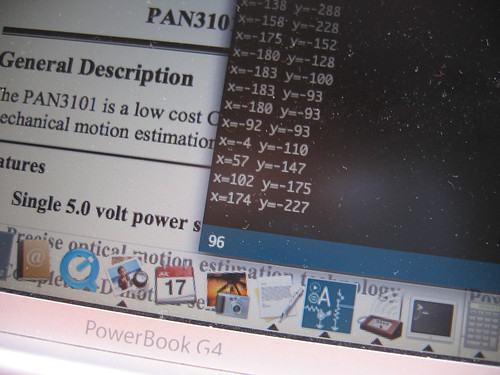
Optical Mouse memungkinkan kita dapat mengetahui koordinat xy dari perpindahan yang terjadi.
Materials
This is what you need:
- Arduino board (any *duino will do) and the Arduino IDE.
- Optical mouse containing the PAN3101, ADNS-2610, ADNS-2083 or ADNS-2051 optical sensor. These sensors come in many mice sold today. If yours has a different sensor, don’t worry too much; they are all much alike. With a bit of luck, the library I wrote will work with other sensors as well.
- OptiMouse library for Arduino
- Some wires and soldering gear.
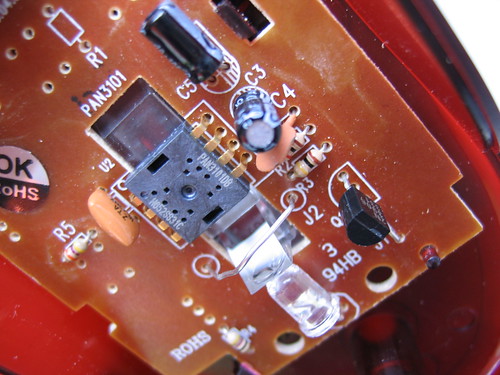
Step 1 – Open up your mouse!
The optical sensor and LED were covered with the black protective cap. Take it off carefully.

Step 2 –Take a look at the datasheets
Check out the datasheet of the sensor you’re dealing with (Google).We only need to connect 4 pins of the sensor to the Arduino, of which two are used for data and two for the power supply. The sensor uses bi-directional serial communcation over one data line (SDIO, pin 3). The second data pin (SCLK, pin 4) is used to time the bits. In case of a different type of sensor, the pin numbers might be different.

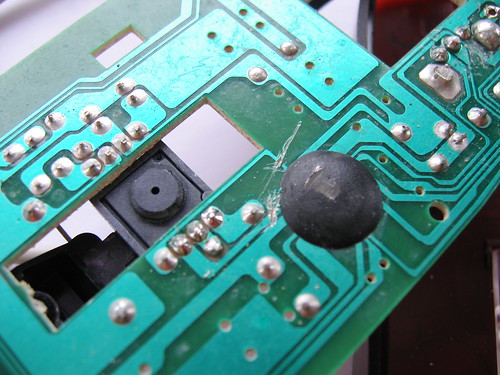
Step 3 – Cutting the controller wires (optional)
To make sure the mouse’s own controller does not interfere with the Arduino, I had cut the SDIO and SCLK wires running to the chip in the mouse. I’m not sure whether this is really necessary, so you might try first without cutting them.
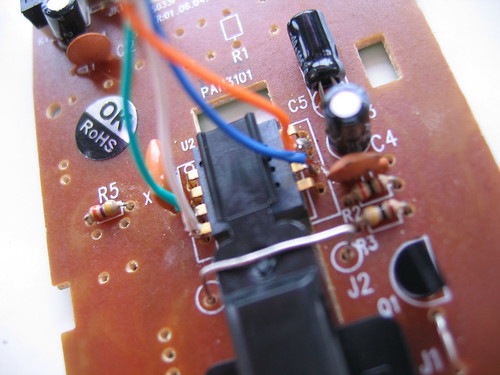
Step 4 – Connecting wires
Solder wires to the four legs of the sensor that I indicated above. The +5V should go to the 5V Power pin on the Arduino, the GND should go to the GND Power pin on the Arduino. Pretty straightforward. Connect the SCLK to Arduino digital pin 2 and SDIO to Arduino digital pin 3. (You are free to use other pins as well, but in this tutorial I’m using pin 2 and 3.)
Step 5 – Example sketch
Download this .zip package with the library and example sketches. Expand the archive and move it into:
arduino-0010/hardware/libraries/
Restart the Arduino IDE. The examples should appear in File > Sketchbook > Examples > Library-OptiMouse. Open the Coordinates example and upload it to your Arduino board. Start Arduino’s serial monitor (38400 baud) to see the coordinates of your mouse coming in… Done!
Sumber : http://www.martijnthe.nl/2009/07/interfacing-an-optical-mouse-sensor-to-your-arduino/
why cant dowmload the arduino code?
ReplyDeleteTry here for anyone coming across this https://github.com/zapmaker/OptiMouse
ReplyDelete